Concept
I was walking towards D1 and kept seeing this large-scale sculpture outside, and I remember when I first visited this campus seeing this, I had this first impression that it reminds me of rings or ribbons forming a pattern in rhythmic gymnastics. Now seeing this, because these shapes differ in sizes and tilts, I wanted to translate this, using this idea of repetition with imperfection into an algorithmic 3D design in p5.js.
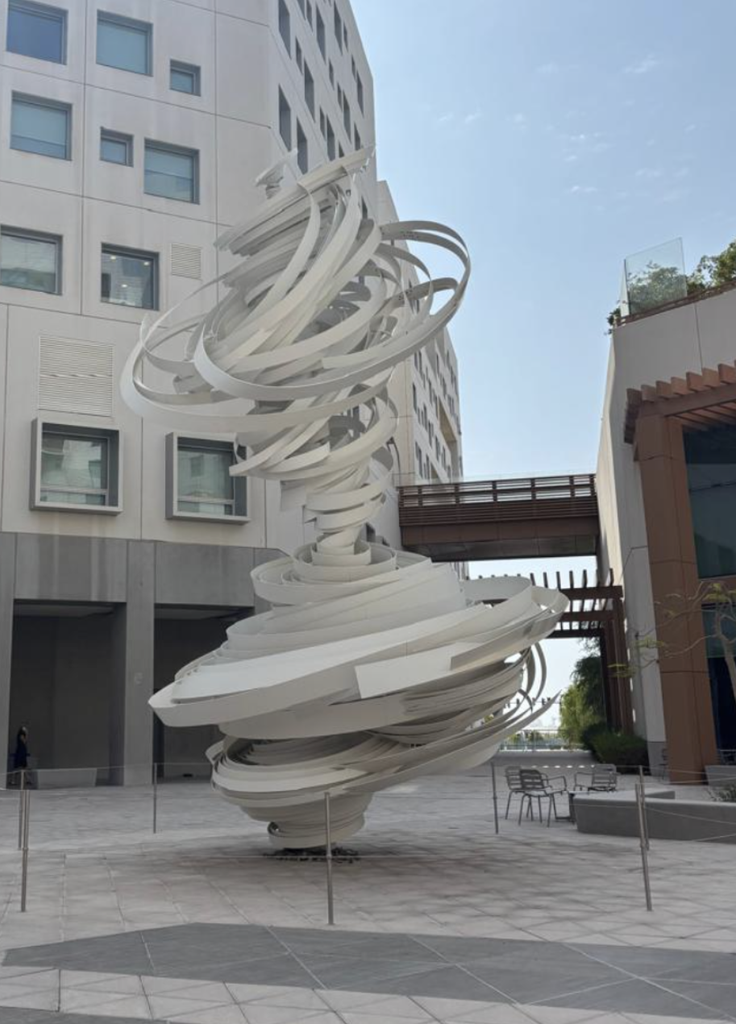
As I made notes, I was thinking about what direction each idea could go in:
- Stack of rings, with each ring independently sized, rotated, and tilted as the loop travels upwards along the Y axis, creating rings that will never stack together perfectly in alignment or spacing.
- Tube swept along a spiral path, which is basically the same concept but instead it uses one shape continuously.
Workflow
I designed both directions in p5.js using buildGeometry() to combine primitives (cylinders and tori) into a single mesh, with random() values controlling each layer’s size, rotation, tilt, and offset. I exported the mesh as an .obj with saveObj(), then changed the size and orientation in TInkerCAD, then opened it in PrusaSlicer to scale it and add supports, and printed it on the Prusa.
Process and Challenges
First Direction (Stack of Rings)
Link: https://editor.p5js.org/sa8831/sketches/-4kZhroTQ
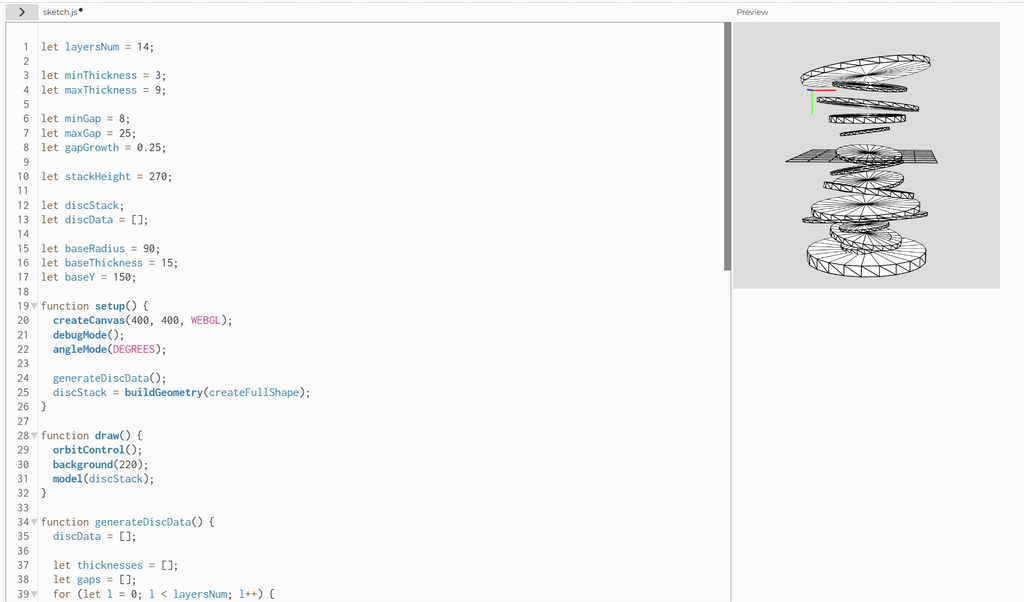
My first version stacked tilted discs of varying thickness with gaps that grew upward. It closely matched my reference, but I knew it couldn’t print: every disc floated with nothing connecting it to the base or its neighbors.
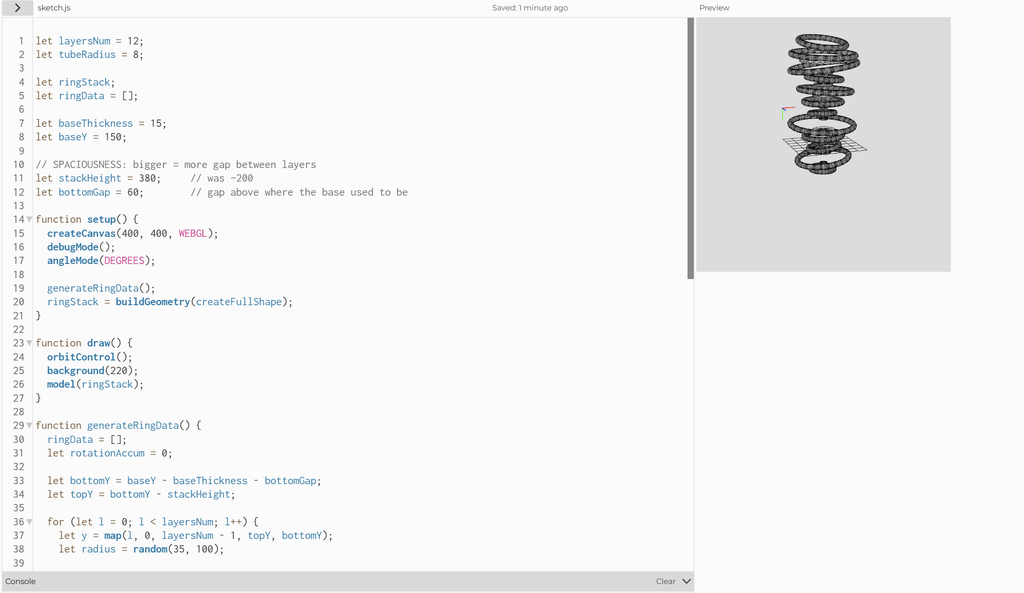
My first fix was to switch to torus rings and slot thin discs between them, hoping to hold the stack together. It failed. The discs were smaller than the ring holes and the stack was stretched to 380 units, so they touched nothing. I had also removed the base, so the piece went from 14 loose parts to 23.
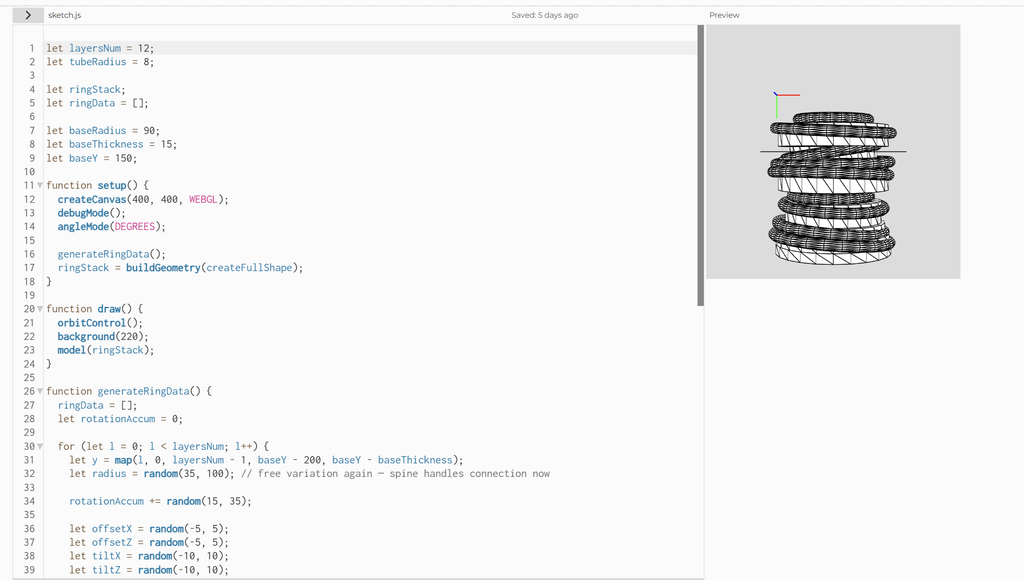
The working fix was a central spine: one cylinder per ring, sized to reach into the ring’s solid tube and overlapping its neighbors vertically, plus the base. This kept each ring’s random radius, tilt, and offset, but joined everything into one body. A side effect was that the spine filled the rings in, so they became solid discs with rounded rims, which brought the form back close to my original discs.
Second Direction (Tube coil swept along a spiral path)
Link: https://editor.p5js.org/sa8831/sketches/CJ9PQA07M
Alongside the rings, I built a continuous tube swept along a spiral path, with the number of turns, radius, and height randomized so every run gave a different coil. I wanted to see whether the same twisting, uneven idea would read differently as one unbroken form instead of stacked pieces. On screen it worked: it looked like a loose, organic spring.
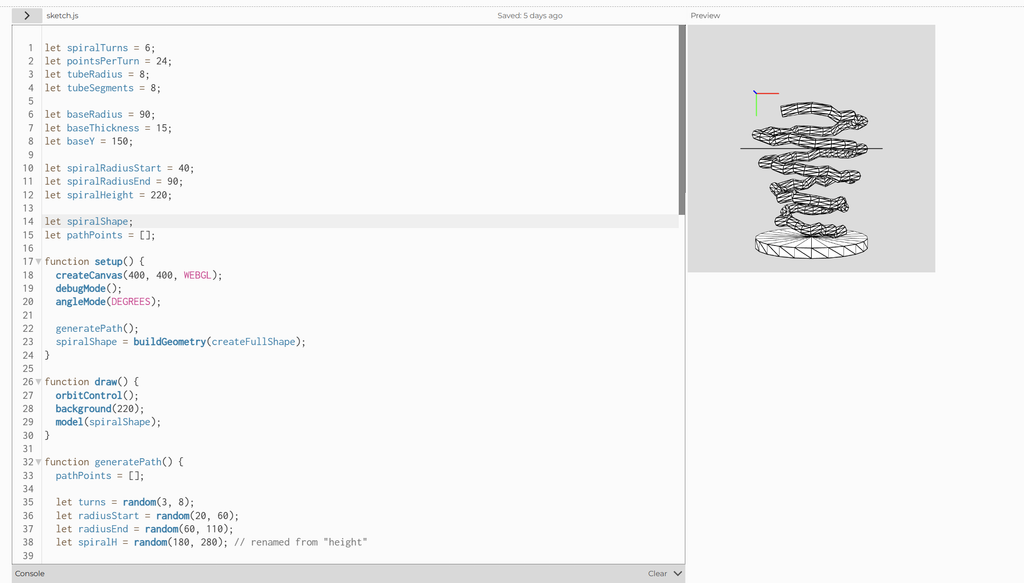
The print didn’t. Every loop of the coil overhangs the one below it, so the slicer needed supports. I chose “supports everywhere,” assuming supports are easy to remove. They weren’t. The coils are small and tightly spaced, so the support material filled the gaps between them. Since the supports and the model were the same white plastic, I couldn’t tell which was which, and the thin tube snapped while I was trying to pull them away. After a tedious attempt at cleaning it up, I gave up.
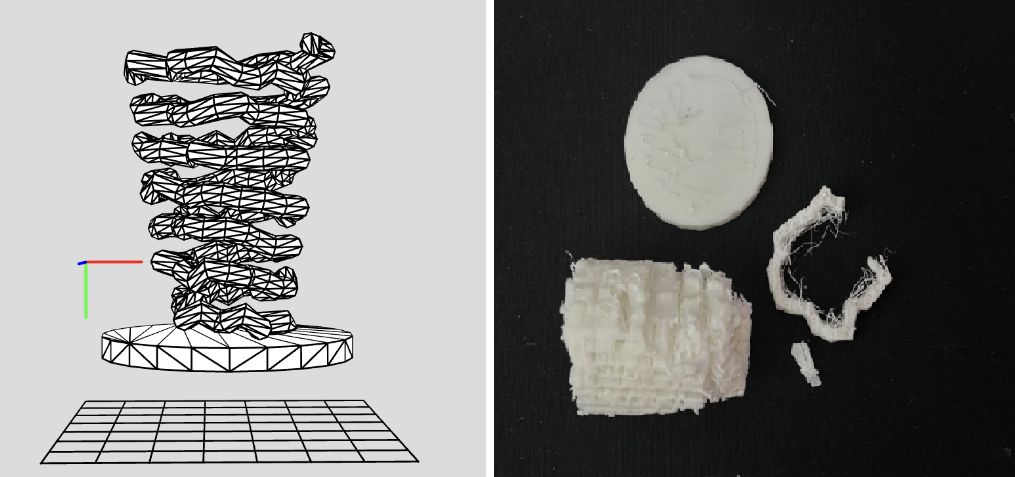
That failure decided my direction. The rings stack layer on top of layer, so their overhangs are shorter and the piece could survive the print. The ring stack became my final piece because I redesigned the form around what the printer could do, not just what looked good on screen.
Final Prints: Ring Stack
I printed three final pieces at different sizes: one large and two smaller. Every piece came from the same algorithm but a different random run, so each has its own silhouette. The large one shows the full stacking of tilted, offset layers, while the smaller two came out as a bowl-topped column and a tapering cone. I chose which outputs to print instead of designing them by hand.
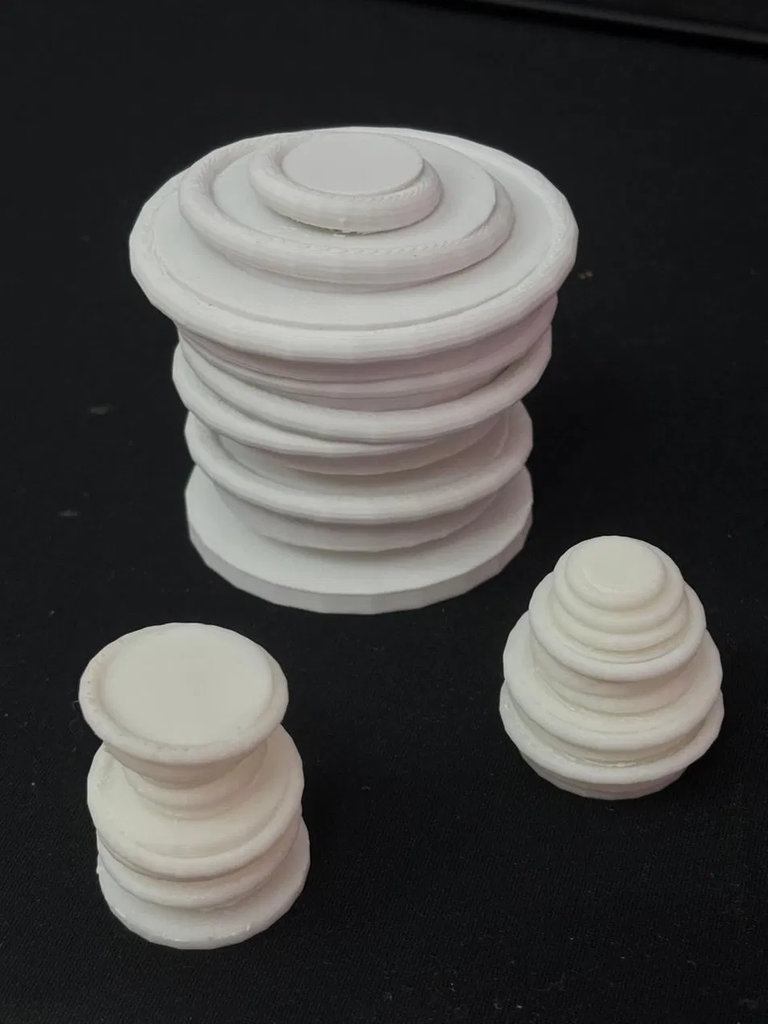
Scale mattered more than I expected. On the small prints, the tilted rims and joins approach the printer’s nozzle and layer resolution, so edges look softer and some layers blend together. The supports were also tedious to remove: they sit in tiny gaps between layers, and I had to cut away each small piece by hand. The large print kept sharp, rippled edges, and its supports were far easier to reach and clean up. In the future I’d try tree (organic) supports, which touch the model at fewer points and come off much more easily than the default grid supports.
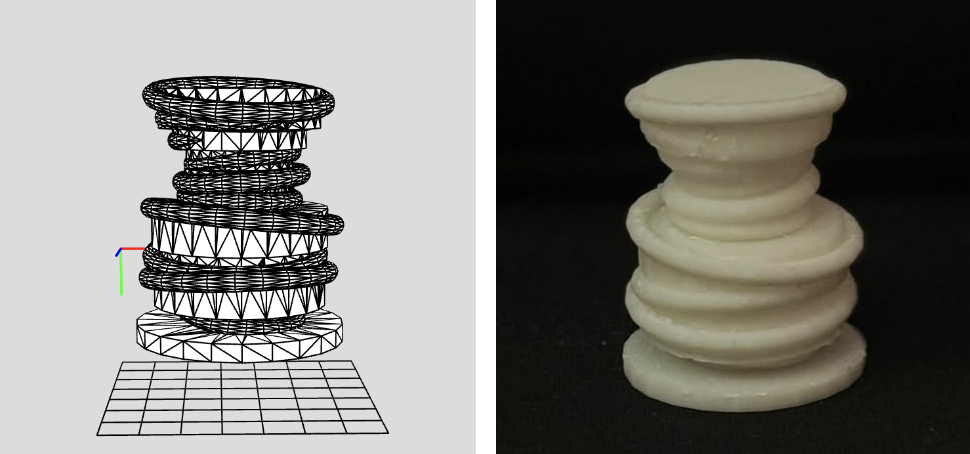
Trial 1 (Small Scale), where it looks like there is a the bowl on top of a column. Sketch (left) and print (right).
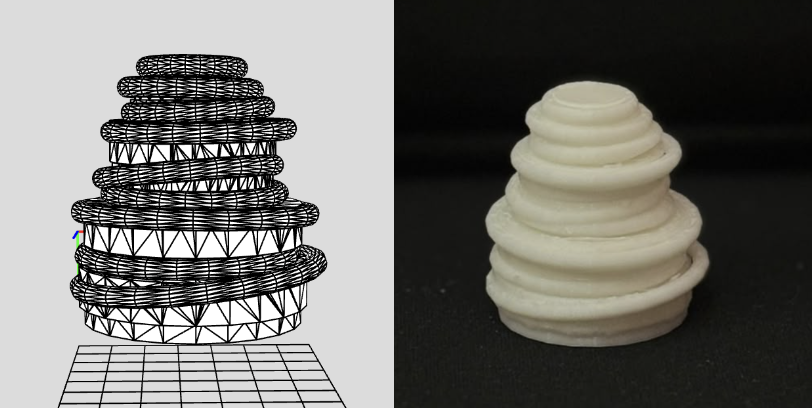
Trial 2 (Small Scale): Looks like a tapering cone, like a beehive. Sketch (left) and print (right).
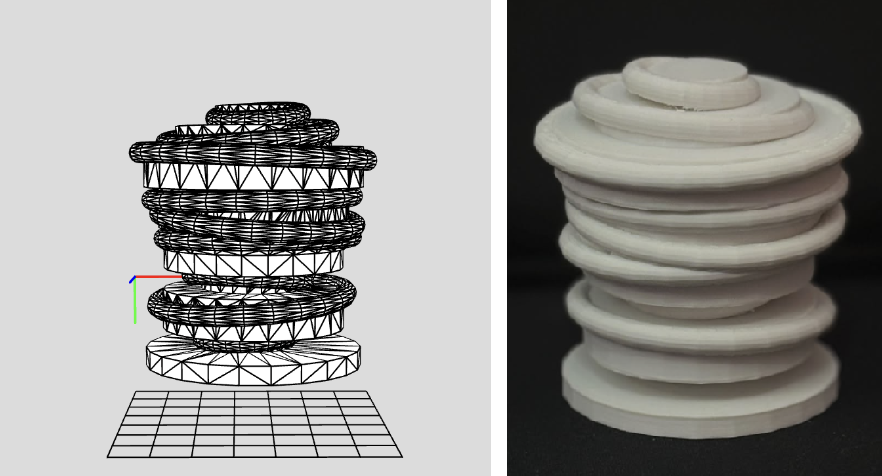
Trial 3 (Large Scale): Looks like a wide stack of tilted, offset layers with a small disc on top. Sketch (left) and print (right).
Reflection
When thinking about it in 3D, I had to understand how things are on-screen versus when printing them, because unexpected things can happen (like supports and scale). So, printing forced me to think of the piece as a physical object that has to hold itself up. With that in mind, I added a base and a central spine, which changed the form itself, turning open rings into solid, rounded discs. Printing also decided which direction I took since the coil looked most interesting on screen but was the least printable, so I dropped it after the supports fused to it.
In p5.js, each run of the sketch is just a new preview, but once printed, each variation became a permanent object, so choosing which one to make became part of the design. Scale taught me a similar lesson of this idea that the same algorithm behaves differently at different sizes, because the nozzle, layer height, and support removal don’t shrink with the model. When doing this in the future, I would design with overhangs and support access in mind from the start, use tree supports, and lock a random seed so I can compare sizes directly.